Inventor® Training
Master Inventor!

Designing iParts in Autodesk Inventor Part II - Page 2
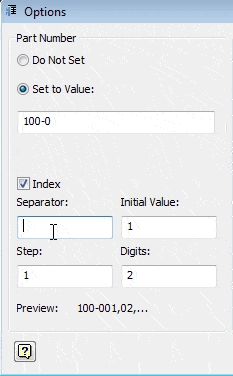
The box is split into two sections, Part Number and Member Name. First, remove the Separator in the Part Number section.
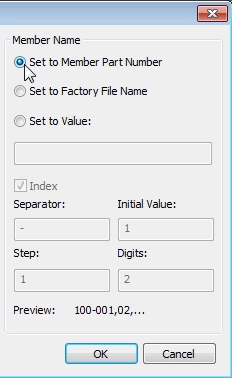
Now set the Member Name to the Part Number Name and click OK.
This is the way we here at TEDCF number our parts, but feel free to number your parts as you see fit.
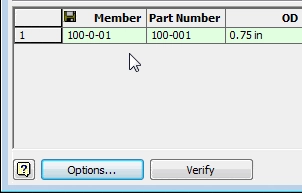
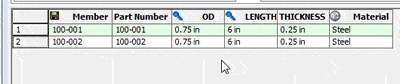
You will notice that the Member and Part Number do not match. To update the Member name, copy the Part Number and paste it into the Member name cell and type the Enter key. You will get a warning letting you know that the Member name is being changed. Click OK.
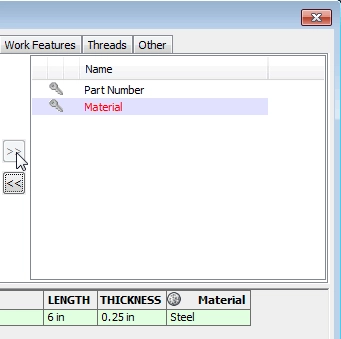
The next step is to add the Material column to the table. Click the Properties tab and then expand the Physical folder.
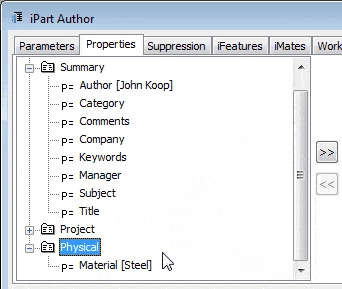
Now highlight the Steel material and use the arrows to move into the box on the right. It is then added to the table.
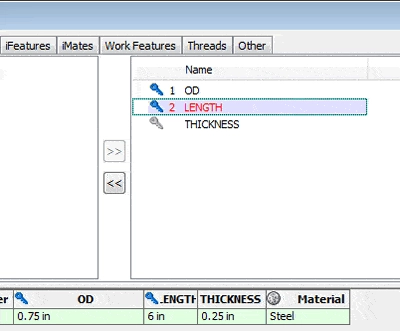
The next step is to add Key Columns to the table. Click the Parameters tab. Now click the key icon next to the OD and then click the key icon next to the LENGTH. This sets the OD as Key Column 1 and the LENGTH as Key Column 2. By setting these as key columns, when you place the iPart in an assembly you will be able to select the values from these columns.
To add more instances of the part you can add more rows. To do this right click on the row heading 1and select Insert Row. This adds another row to the table and you can change the column values as need be.
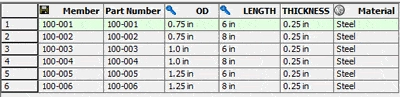
To finish the table, add the rows from the picture below and then click OK.
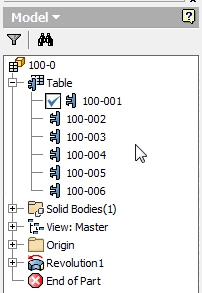
If you look in the Model tree you can see that the table has been added and if you expand it, you can see all instances of the iPart.
In this tip, you learned how to set up an iPart Table and how to set Key Columns. In the next tip we will test our iPart to make sure it functions correctly.
You can also improve your productivity with Inventor by watching our courses.
Algebra the Game
Teaches Algebra while you Play!
Play on any device connected to the internet.

New!
Algebra the Course - Fundamentals
Prerequisites: None, anyone can learn.
No Installation Required
Watch from any device connected to the internet.
$19.95
Algebra the Course - Fundamentals
This course makes algebra simple. It's based on skills used in Algebra the Game, and it shows you how to solve real life problems.