Inventor® Training
Master Inventor!

Designing iParts in Autodesk Inventor Part II
This is the second in a series of Tips that shows you the iPart process. In the last tip, we set the Custom Parameters, built the part and then set the part Material. In this tip we will set up the iPart Table and in the next tip, we will Test all of our parts to make sure they work correctly.
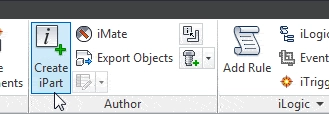
Start off by opening up part 100-0 (The part we designed in the first tip). Now click the Manage tab and select Create iPart from the Author panel.
The first thing we need to do is to fix the Part and Member numbering. Click the Options button in the bottom left of the dialog box.
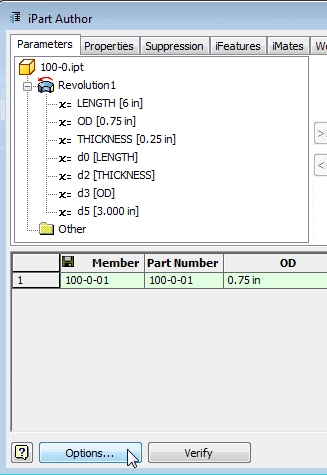
The box is split into...
Algebra the Game
Teaches Algebra while you Play!
Play on any device connected to the internet.