Designing iParts in Autodesk Inventor Part I
This is the first in a series of Tips that shows you the iPart process. In this Tip, we will go through the first few steps of iPart design. We will set the Custom Parameters, build the part and then set the part Material. In the next Tip we will set up the iPart Table.
We’re going to design a steel rod with a hole through it. This is a rather basic part, but the process for more complicated parts is the same.
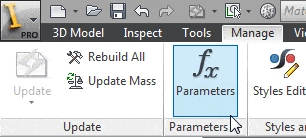
The first step is to add the Custom Parameters. Open a new part and then click the Manage Tab and select Parameters.

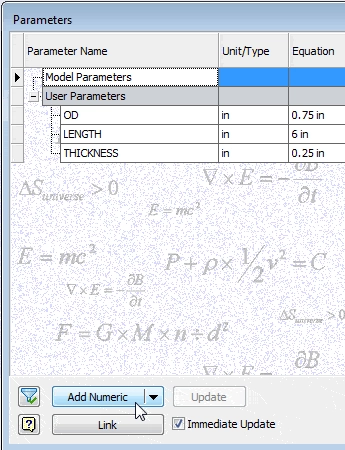
Now add these three parameters. To add custom parameters, click the Add Numeric button at the bottom left of the dialog box. These parameters will control the iPart. When we set up the iPart table, we will set the OD and Length parameters to Key Parameters.

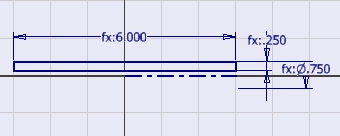
Now draw and constrain this sketch using the Custom Parameters.

Once you have done that…
Algebra the Game
Teaches Algebra while you Play!
Play on any device connected to the internet.

