Inventor® Training
Master Inventor!

Control Inventor Models with Custom Part Templates
This training tip shows you how to create a custom template and how to take charge of the location of sketch geometry.
The first step is to change an important default settings.
By default, when you create a new sketch a projected node is located on the origin of the sketch. It’s OK to use the node on the first sketch, but subsequent sketches should be constrained relative to existing geometry.
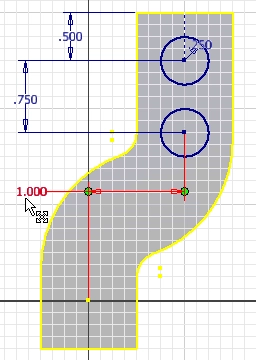
Take this sketch for example. It uses a 1-inch dimension to constrain the horizontal location of the bottom circle, and the top circle is horizontally located using a construction line. The top circle is constrained relative to existing geometry, while the bottom circle is constrained to the origin of the sketch.
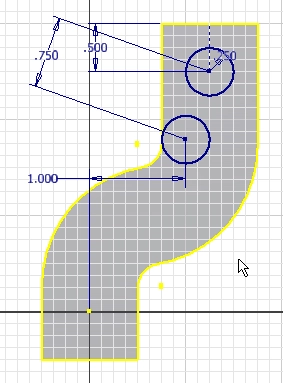
This is what the sketch looks like after changing the...
Algebra the Game
Teaches Algebra while you Play!
Play on any device connected to the internet.