Inventor® Training
Master Inventor!

Rotating Views with Autodesk Inventor - Page 2
The Edge option is the one we’re going to use because it’s used to set an edge horizontal or vertical.
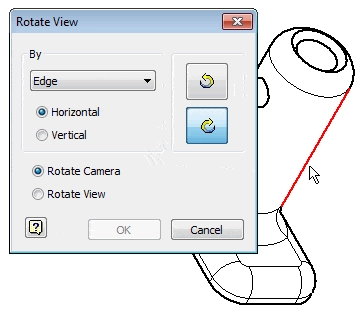
Select an edge.
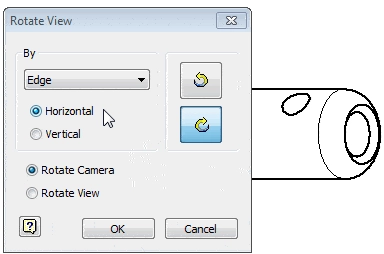
Since the Horizontal option is selected, the view rotates to make the edge horizontal. Select the Vertical option.
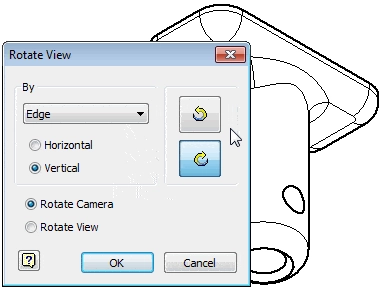
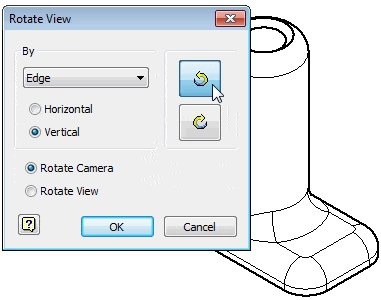
This makes the edge vertical, but the view is upside down. Use the directional icons on the right side of the dialog box to flip the view right side up.
The Rotate Camera and Rotate View options control whether or not you want dependent views rotated. Rotate Camera will rotate all the child views created from this view. So they’ll have the same orientation as the rotated parent view. Rotate View will only rotate this view. All the child views created from the view will not be rotated.
Why is this important?
Isometric views are not the only views that can be rotated. You can rotate any view you can create. This is especially helpful for rotating section and detail views, and it gives you more control over the views you create.
Algebra the Game
Teaches Algebra while you Play!
Play on any device connected to the internet.

New!
Algebra the Course - Fundamentals
Prerequisites: None, anyone can learn.
No Installation Required
Watch from any device connected to the internet.
$19.95
Algebra the Course - Fundamentals
This course makes algebra simple. It's based on skills used in Algebra the Game, and it shows you how to solve real life problems.