Inventor® Training
Master Inventor!

Single Point Template in Autodesk Inventor
This tip shows you how to create a template that has the origin of the sketch projected onto the first sketch. I recommend that you read Auto-Projecting Geometry in Autodesk Inventor before you read this tip. It will show you how to setup Inventor so that you can use the Single Point Template.
Start by opening a new part file, and then project the Center Point in the Origin folder in the browser onto the origin of the first sketch.

Open the File tab in the Application Options to see where you store template files on your system.
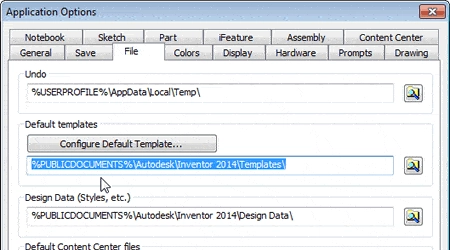
The %PUBLICDOCUMENTS portion is C:\Users\Public\Public Documents. You can always change the location, but be sure to copy the Templates folder to the new location.
Now that you know were template files are stored, save the file in the templates folder. You might want to save it under a name that describes the template, like Single Point Part.
You can also improve your productivity with Inventor by watching our courses.
Algebra the Game
Teaches Algebra while you Play!
Play on any device connected to the internet.