Take Your Skills to a New Level!
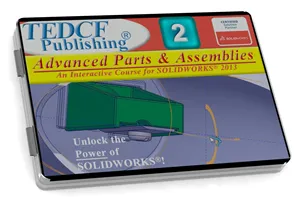
The SolidWorks 2013: Advanced Parts & Assemblies course is the next course in the series. It shows advanced methods of creating complex parts and assemblies. You'll use Excel worksheet to create parts. You'll practice generating frames while learning about weldments, you'll practice adding welds to assemblies, and many more advanced skills.
If realistic models and assemblies are what you're looking for we've got you covered. This course shows you how to make your parts and assemblies look real by setting up custom materials and appearances, and using RealView. You'll also learn how to make accurately constructed 3D threads that look real.
As with all our courses the main goal of this course is to increase your productivity, and a helpful tool for this is configurations. Configurations can be used to produce different versions within a single part file. You construct the base component and then use configurations to add unique features on each version. Configurations are explained in detail.
Design Tables are another tool that will enhance your productivity. This method creates multiple models in a single file. It's similar to configurations but models are generated from an Excel worksheet. We show you all the steps.
In the Bottom Up Design approach you build your assemblies from the ground up. Add a few parts and then mate them together. Add more parts and continue mating them together until the assembly is complete. This course shows you how to use all the standard and advanced mates that come with SolidWorks.
The Middle Out Design approach is similar to Bottom Up, but some components are developed within the assembly environment. This can be a little cumbersome, but it's a good approach and it's discussed in the course.
The most popular design approach is Top Down Design. With this method you develop your entire assembly in a single part file. You'll have extensive practice using this method.
Workflows used by professionals tend to mix design approaches. So you might use Top Down Design to build your assembly. Export it to an assembly file, and then add standard components like screws and bolts from the SolidWorks Toolbox. Adding external components to an assembly is the Bottom Up approach. So you'll typically mix design methods to create a workflow that matches your needs.
This course covers it all with detail and easy to understand explanations. It's packed with tips and tricks that will make you an extremely productive modeler.
79 Lessons (Listed Below)
7.3 hours of instruction
Browse through the lessons from the following SolidWorks 2013 courses and watch sample lessons.
SolidWorks 2013: Professional Modeling SolidWorks 2013: Advanced Parts & Assemblies SolidWorks 2013: Mechanical Drawings SolidWorks 2013: Sheet Metal DesignOur SolidWorks courses require No Installation. You can watch them on any device connected to the internet.
You will receive an email containing your User Name and Password. Login to your account and start learning. It's that easy.
While you're logged into your account you can download files used in the courses, watch lessons, and practice the tasks taught in the lessons. Keep in mind that you will use your installation of SolidWorks® to practice.
Get your SolidWorks® 2013 training now. You can start learning in minutes.
SolidWorks® 2013:
Advanced Parts & Assemblies
No Installation Required
Watch from any device connected to the internet.

$59.95 - $229.95
Watch Sample Lessons
Watch the first hour of the Professional Modeling course for SolidWorks 2013.
 Click to Watch!
Advanced Parts & Assemblies
7.3 hours of instruction
Lessons
Introduction
Files and Folders
Custom Materials
Mastering Materials
Creating Helixes
Helical Threads
Limits to Reusing Sketches
RealView and Scene Display
Introduction to Configurations
Add Configurations
Machined Versions
Comparing Configurations
Configuration Parameters
Material Configurations
Setting Surface Materials
Updating Template Configurations
Derived Configurations
Cast Configurations
Machined Configurations
Parent Child Configurations
Derived Material Settings
Introduction to Design Tables
Design Table Parameters
Parameter Syntax
Blank Design Tables
Select and Rename Dimensions
State Design Table Parameters
Reduce Design Table Memory I
Reduce Design Table Memory II
Importing Excel Files
Introduction to Equations
Equations and Configurations
Feature Parameter Equations
Conditional Statements
Equations and Design Parameters
Direct Input Equations
Custom Assembly Templates
Introduction to Weldments
Modifying Joints and Members
Trim Extend Members
End Caps
Gussets
Weld Preparations
Exporting Bodies to Assemblies
Fillet Weld Beads
Weld Strategies
Intermittent Welds
Custom Libraries
Custom Profiles
Using Custom Profiles
Degrees of Freedom
Understanding Mate Errors
Mate Type Errors
Mate Strategies
Width Mate
Symmetric Mate
Linear Coupler Mate
Advanced Distance Mate
Advanced Angle Mate
Organizing Assembly Components
Bottom Up Design
Linear Component Pattern
Shortcomings of Bottom Up Design
Middle Out Design
Creating Sub Assemblies
Adding the Toolbox
Building Sub Assemblies
Create Parts from Surfaces
Effective Smart Mates
Advanced Assembly Aspects
Projecting Curves to Surfaces
Cutting With Surfaces
Assemblies into Parts
Using Inserted Parts
Linked Part Files
Details of External References
Split Part Best Practices
Strategy for Multi-Body Modeling
Conclusion
