Inventor® Training
Master Inventor!

Change Sketch Plane in Autodesk Inventor
You’ve created a sketch on one plane only to find that you wanted it on a different plane. This tip shows you how to put an existing sketch on a different plane.
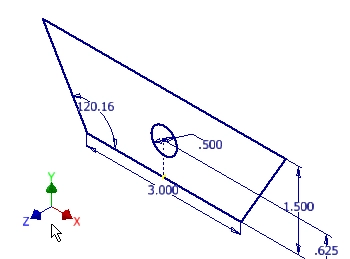
This image shows a sketch that was created on the X-Y plane.
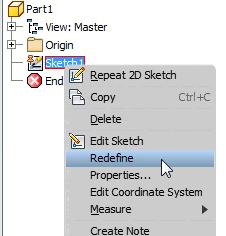
To put it on the Y-Z plane, right click the sketch in the browser and select Redefine.
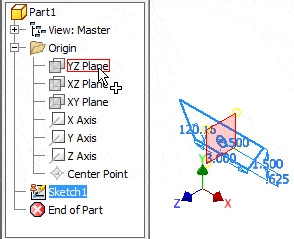
The next step is to select the new plane. In this example I’m selecting the Y-Z plane, but you can select any plane including flat features surfaces.
You can also improve your productivity with Inventor by watching our courses.
Algebra the Game
Teaches Algebra while you Play!
Play on any device connected to the internet.