Inventor® Training
Master Inventor!

Creating Inventor 2D Splines - Page 2
Adjusting a Spline
To move the spline, place your pointer over the curve and drag it to a new location.
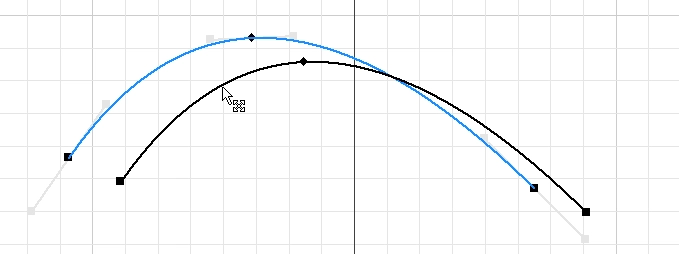
To adjust the shape of the spline, place your pointer over a spline point and drag the point to a new location.
You can drag any spline point to adjust the shape.
You can also adjust several spline points at once by holding the Alt key down and dragging a spline point. When you do this, Inventor will attempt to keep the same general shape of the spline while moving the points.
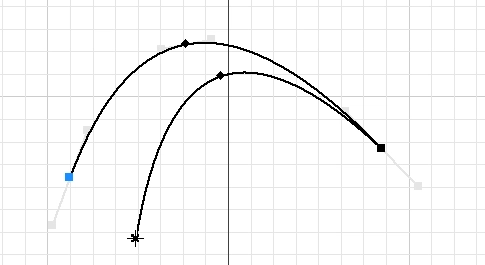
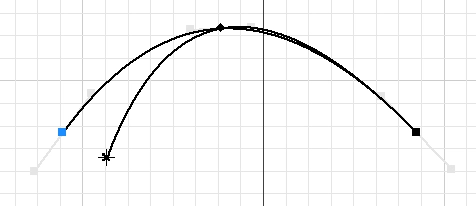
Creating a Loop
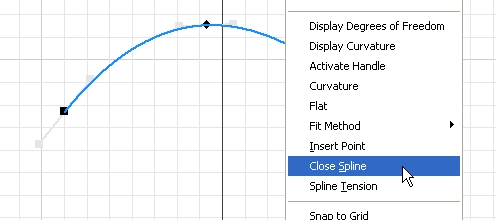
You could have created a looped spline by clicking three points, and then double clicking the first point. Since you’ve already drawn the spline, you can create the same loop by right clicking the spline and selecting Close Spline.
In the next Tips and Tricks called Constraining Splines you will add a Spline Point, and then use Construction Lines to gain more control over the shape of the spline.
Algebra the Game
Teaches Algebra while you Play!
Play on any device connected to the internet.

New!
Algebra the Course - Fundamentals
Prerequisites: None, anyone can learn.
No Installation Required
Watch from any device connected to the internet.
$19.95
Algebra the Course - Fundamentals
This course makes algebra simple. It's based on skills used in Algebra the Game, and it shows you how to solve real life problems.