Inventor® Training
Master Inventor!

Full Round Fillets with Autodesk Inventor - Page 3
You just select one side, the middle, and then the other side. When you select each surface the next selection icon will automatically become active.
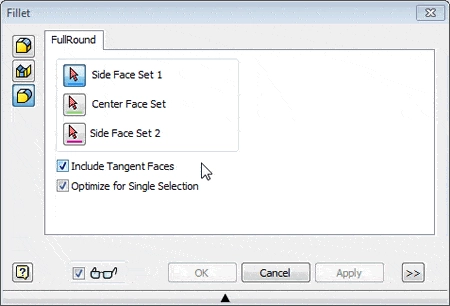
That is, the active icon will automatically move down the list if the ‘Optimize for Single Selection’ option is checked. For example, you can select several faces for Side Face Set 1 by un-checking the option. In most cases you’ll leave it checked.
I also leave the ‘Include Tangent Faces’ option checked, because this options lets the fillet automatically continue over tangent, adjacent faces.
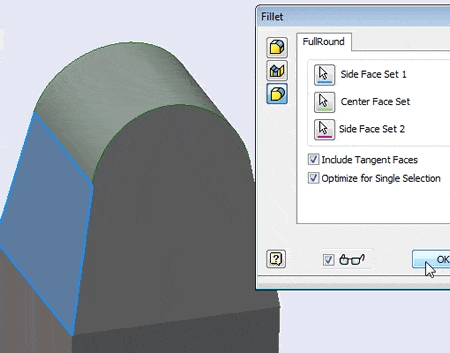
Select the faces, and click OK.
Why is this important?
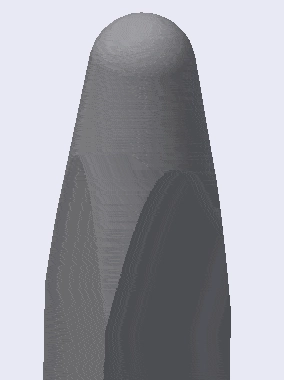
This was a simple example of how the command can create a shape that would otherwise take several steps. The construction of more complicated shapes can be extremely simplified using the command.
For example, apply the Full Round command again to the adjacent faces of the same part and you get this.
You can also improve your productivity with Inventor by watching our courses.
Algebra the Game
Teaches Algebra while you Play!
Play on any device connected to the internet.

New!
Algebra the Course - Fundamentals
Prerequisites: None, anyone can learn.
No Installation Required
Watch from any device connected to the internet.
$19.95
Algebra the Course - Fundamentals
This course makes algebra simple. It's based on skills used in Algebra the Game, and it shows you how to solve real life problems.